A standard abdominoplasty is where an incision is made at the waist crease and also around the umbilicus (belly button or navel). The umbilicus is freed from its attachment to the abdominal skin all the way down to the abdominal wall where it is still left attached to the underlying muscles below. This is so it will still have blood circulation to keep it alive so it can be re-positioned later on. An umbilicus is nothing more than a scar, a remnant of what once was where the fetal umbilical cord entered the abdominal cavity, carrying blood with oxygen and nutrition from the mother to the fetus. After the umbilical cord is cut the umbilicus contracts and forms a scar – the appearance it has now. If you envision first making a waist crease incision, then lifting the abdominal skin off the abdominal wall upwards to the rib cage, you will encounter the umbilicus. It acts like a button on a couch or chair, holding down the skin to the abdominal wall, If you encircle the umbilicus with an incision and separate it completely from the abdominal skin, you now remove that barrier and the skin can now be lifted all the way up to the rib cage. This exposes the entire abdominal wall for tightening. As the abdominal skin is lifted upwards towards the chest, there is now a small hole in it where the umbilicus once was attached.
A standard abdominoplasty is indicated when there exists excess skin of both the upper and lower abdomen or when it is necessary to tighten the entire abdominal wall. Usually when there is significant excess skin of the upper abdomen, there is also laxity of the upper abdominal wall as well, requiring a surgical approach of this type. Occasionally, there are cases where there is minimal to no excess skin of the upper abdomen but there is enough laxity of the upper abdominal wall that this approach is still required, even though there is no upper abdominal skin to remove. In this case, the abdominal skin needs to be lifted all the way upwards to the chest for the purpose of gaining access to the upper abdominal muscles so that they can be tightened from the lower chest all the way down to the pubic bone in the pelvis. In these cases there are also some other useful alternative approaches such as “floating the umbilicus” but that will be discussed later. The standard abdominoplasty is the most common of the four procedures in my practice, and probably so for most plastic surgeons.
After the abdominal skin is lifted all the way up to the rib cage, and the muscle is tightened, the operating table is partially flexed, bringing the patients back up and flexing the hips. The excess skin is pulled downward, past the incision and the excess skin is marked with a surgical marker. The excess skin is then removed. The incision is temporarily closed with staples, sutures or clamps so that the contours can be assessed. Once the surgeon is comfortable with the amount of skin removed, there is one more concern before final wound closure: the umbilicus! The umbilicus is still sitting attached by itself to the abdominal wall, underneath the abdominal skin flap. A new site on the abdominal skin flap must be marked just above the underlying umbilicus and a new hole made in the skin. It is through this hole that the umbilicus is now pulled through and sutured to create a new umbilicus. The umbilicus will now have a scar around it in its border, but this is usually not well seen. In the pre-surgical state, the umbilicus often has a horizontal appearance to it because the excess, upper abdominal skin is under the influence of gravity, settling on the umbilicus, and flattening it giving it the horizontal shape, similar to a “frown.” Now that the excess skin is gone, and there is no upper abdominal skin weighing down on the umbilicus (actually, the abdominal skin is now tight and this supports the umbilicus upwards) the umbilicus now has a round or vertically oriented elliptical appearance which is very youthful in appearance. This is a visual cue of youth. After the umbilicus is relocated to its new home, the abdomen is now prepared for closure by the method of choice of the surgeon. I will discuss closure a little later on.
The Steps in Performing a Standard Abdominoplasty
Step 1
The blue ellipse indicates the proposed amount of skin to be removed. The lower solid blue line is where the initial incision is made. The dotted blue line is the proposed upper portion of the skin excision (removal). This can vary upwards or downwards depending upon how much skin excess exists. The blue circle around the navel (umbilicus) represents the incision around the umbilicus. the umbilicus remains attached to the underlying abdominal muscles and is not lifted upwards with the remaining abdominal skin. This leaves a circular hole in the skin flap (see Step 5). The yellow area shows the extent to which the abdominal skin is elevated off the abdominal wall.
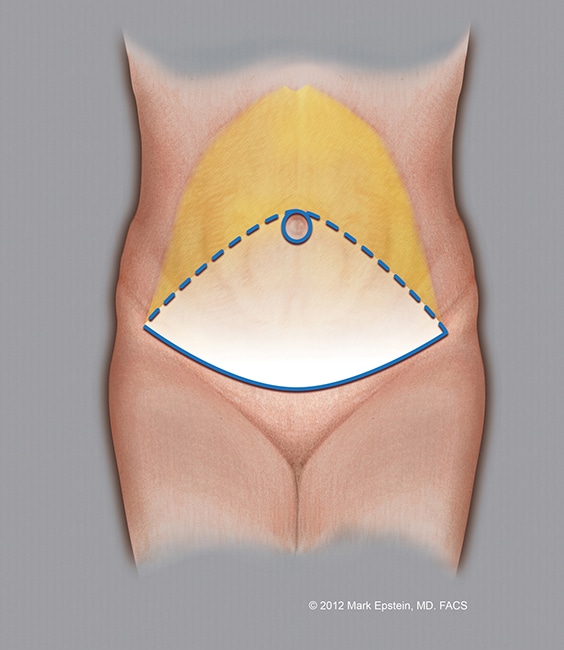
Click to Enlarge
Step 2
The abdominal skin is elevated off the abdominal wall, the abdominal musculature is revealed. Note, the umbilicus remains attached to the muscles in the midline.
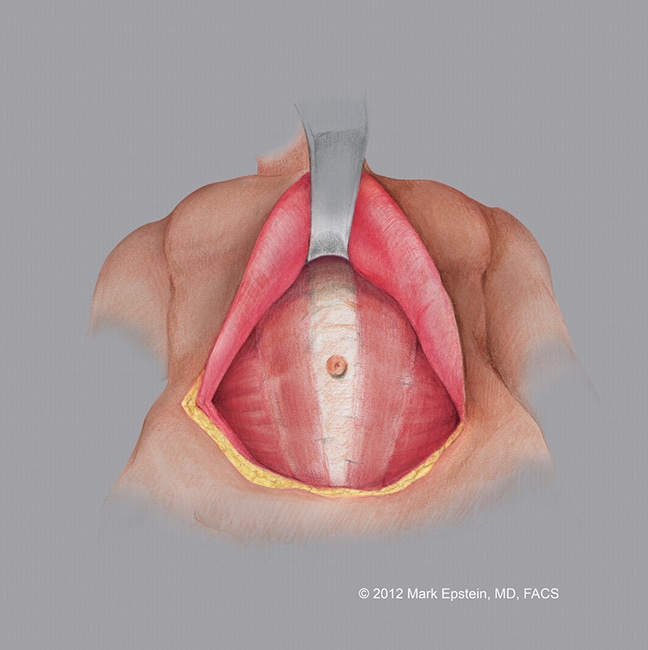
Click to Enlarge
Step 3
The abdominal wall musculature is tightened using a special running suture. The muscles are brought together in the midline.
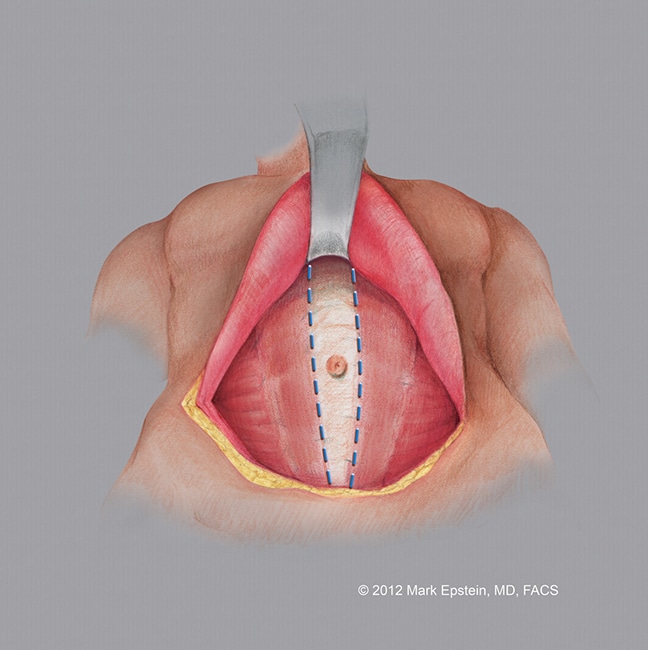
Click to Enlarge
Step 4
The completed repair of the abdominal musculature is shown.

Click to Enlarge
Step 5
The excess skin is elevated above the abdominal wall and pulled downward. The area of resection (removal) is indicated with a dotted line. The original hole in the abdominal skin is below the line of resection (removal of skin) and therefore is removed with the abdominal skin.
Click to Enlarge
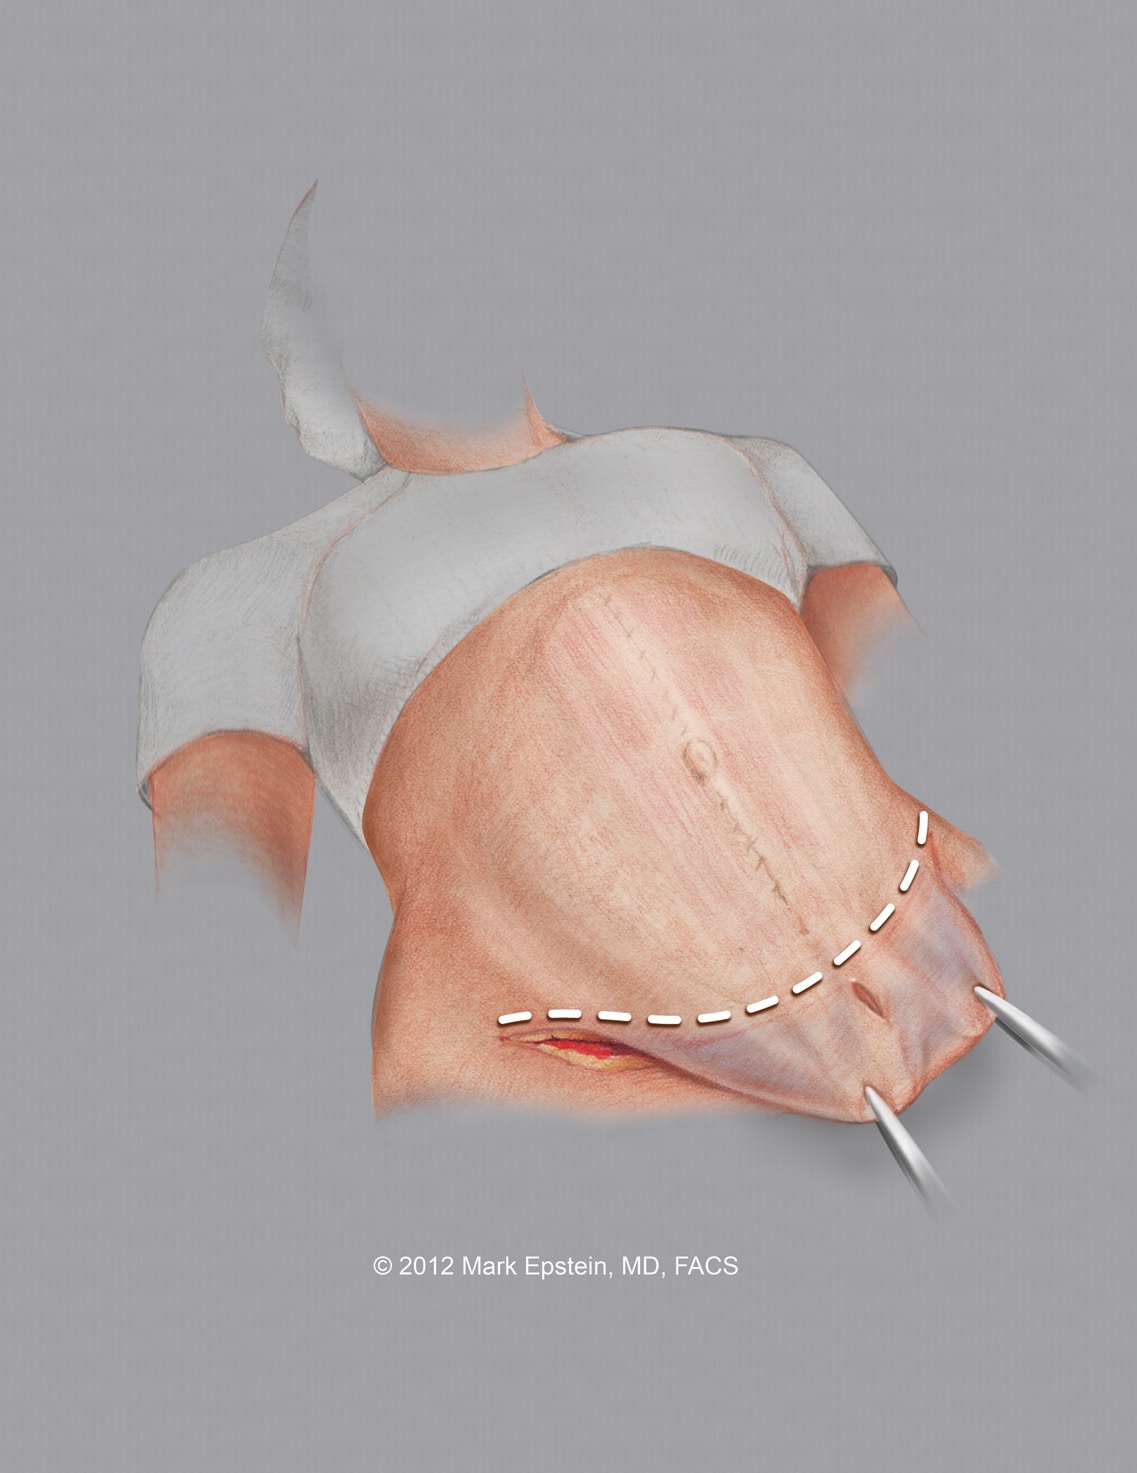
Step 6
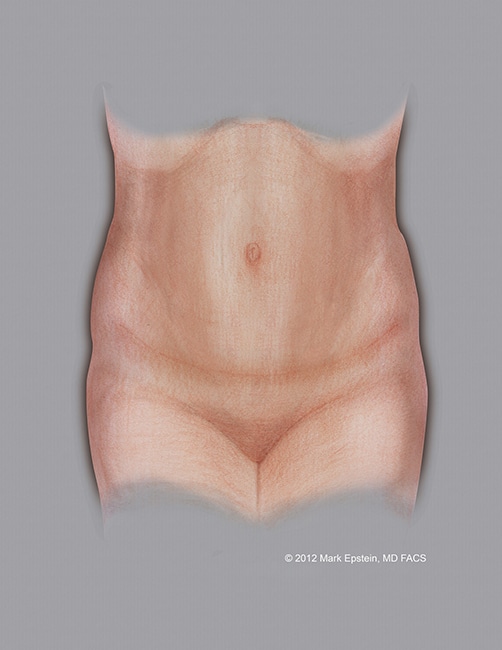
The final result is shown. The excess skin has been removed, a new hole was created on the abdominal skin flap and the umbilicus (which remained attached to the abdominal muscles below) is now brought out through that hole and sutured to that hole. Note the scar across the waist crease of the abdomen and around the umbilicus.
Click to Enlarge
Sections - Abdominoplasty Types
- Why Do We Need Different Types Of Abdominoplasty?
- Standard Abdominoplasty With “Umbilical Re-Positioning”
- Standard Abdominoplasty with a “Floated Umbilicus”
- Mini-Abdominoplasty
- Extended Abdominoplasty
- Circumferential Abdominoplasty “Belt-lipectomy”
- Flowchart – How to Select an Abdominoplasty Procedure
Prev Chapter: How is an Abdominoplasty Performed? »
Next Chapter: Combination VASER/PAL HI-Definition Lipo-Abdominoplasty »